Today, we’re diving into another crucial aspect of RV living—your fresh water system. Whether you’re filling up your onboard tank for an off-grid adventure or hooking up to a convenient city water supply, it’s important to have the right tools and know-how to get it done smoothly. Here’s a breakdown of my fresh water setup, including the products I’ve chosen and how I use them.
“Water is the quiet hero of every journey, keeping us refreshed, inspired, and ready for the next adventure.”
The Key Differences
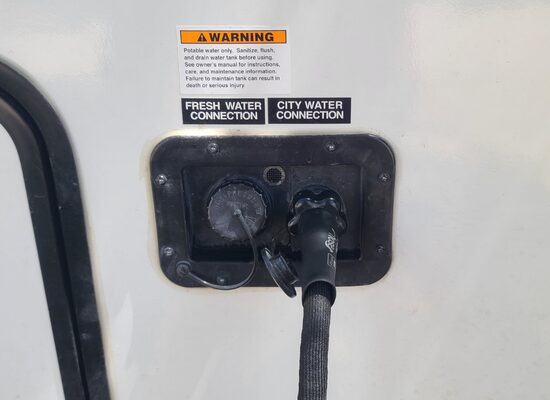
So, what’s the difference between filling your tank and hooking up to city water? The main distinction is that when you fill your tank, you’re carrying a set amount of water with you—ideal for boondocking or dry camping. On the other hand, connecting to city water means you have a constant supply, so there’s no need to worry about running out. However, when using city water, it’s crucial to regulate the pressure to avoid damaging your RV’s plumbing AND monitor your grey and black water tanks so they don’t overflow!
Both methods have their place, depending on your travel plans and the amenities available at your destination. With the right setup, like the one I’ve outlined here, you’ll be prepared for any situation, ensuring your glamping experience is as luxurious and hassle-free as possible.


What to Grab Before You Go!
Here are the products I use to make sure my fresh water setup is efficient and easy to manage: (Complete with links to purchase for yourself on Amazon.)
- Water Hose Valve
- Inline Water Filter
- Insulated Hose
- Expandable Hose
- Garden Hose Nozzle
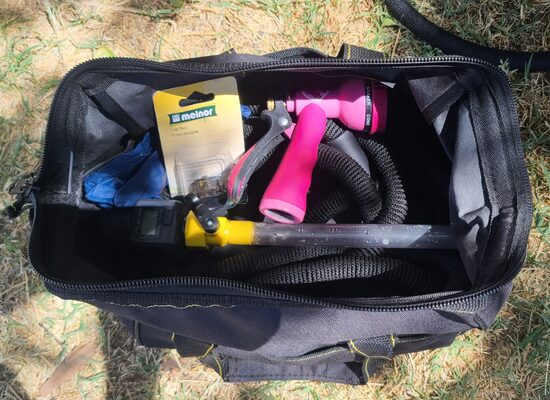
- 12″ Storage Bag
- Brass Caps & Plugs
- Plastic Plug
Why Do I need it?
Wondering what it’s all for, and why it’s important? Here are some brief descriptions and justification for the items I’ve mentioned above.
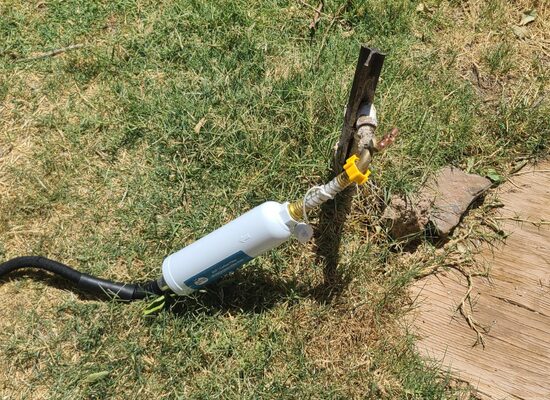
Water Hose Valve: Keeping track of how “full” your tank actually is can be difficult. This valve gives you control over the water flow, making it easier to avoid overfilling and spills.
Inline Water Filter: Water taste and quality varies across different parts of the country. Using a filter ensures that the water you’re putting into your tank is clean, safe, and tastes good, no matter where you are.
Insulated Hose: A must-have if you’re hooking up to city water in the winter. This insulated hose prevents freezing, ensuring a steady water flow even in cold weather.
Expandable Hose: The convenience of an expandable hose is unmatched. It’s lightweight, easy to store, and expands when in use, then shrinks back down for easy packing.
Garden Hose Nozzle: This is a nice to have when you need to use your hose regular garden hose applications. Watering plants, washing vehicles, and winning impromptu water fights.
12″ Storage Bag: Keeping your hoses, valves, and filters organized is key. I keep my fresh water bag front and center in the driver’s side of my front storage hold. Water and power are the first things I address when I get to a “full hook up” destination.
Brass Caps & Plugs: These caps and plugs prevent foreign objects from getting into your hose, which means you’re also preventing them from contaminating your tank and clogging your water pump.
Plastic Plug: Adding a plastic plug to seal off open connections helps protect your water system from backflow or contamination. Again, you don’t want random dirt particles to be the reason why you have to replace your water pump!
Filling Your Fresh Water Tank
When you’re headed off the grid, your RV’s fresh water tank becomes your lifeline. My RV has a 60-gallon capacity, which is more than enough for a few days of showers, dishwashing, and other essentials. To fill your tank, follow these simple steps:
- Connect Your Water Hose Valve: Start by attaching a water hose valve to the end of your hose. (I keep mine attached at all times.)
- Attach the Inline Water Filter: Before the water even touches your tank, make sure it’s filtered for purity. An Inline Water Filter ensures that any debris, bacteria, or other contaminants are filtered out, keeping your water safe and clean.
- Use the Expandable Hose: Once your filter is in place, it’s time to connect your hose. I recommend an Expandable Hose because it’s lightweight, easy to store, and expands to reach wherever you need it to. When you’re done, it shrinks back down, taking up minimal space.
- Monitor the Fill-up: As water flows into your tank, keep an eye on the gauge to avoid overfilling. It’s a good idea to stop periodically to check the level and make adjustments as needed. Stand off to the side, not directly in front of the hose. Tanks burp and splash.
- Store Everything Properly: When you’re done, detach the hose, valve, and filter, and store them in a Storage Bag. This keeps everything organized and ready for the next time you need to fill up.
Connecting to City Water
When you’re at a campground or RV park with city water access, connecting directly to the supply can be a game-changer. Here’s how to do it:
- Attach the Hose: Start by connecting your RV to the city water supply using an Insulated Hose. or Expandable Hose. (Depending on weather.)
- Use Brass Caps & Plugs: If you have extra hose connections or outlets that aren’t in use, seal them off with Brass Caps & Plugs. This prevents leaks and keeps your system airtight.
- Keep It Protected: Make sure your hose path is clear of sharp rocks and glass. Keep it clear of walking paths, parking spots, driveways, or any other places where your host might get crushed, and avoid creating a tripping hazard by running it as close to your RV as possible.
- Store Everything You’re Not Using: Just like when filling your tank, make sure to store everything properly once you’re done. Keeping your gear clean and organized ensures it’ll be ready to go for your next trip.
Happy glamping!
*As an Amazon Associate, I earn commission from qualifying purchases.
